Mini Valentine Tartlets
Uitgelicht onder: Collectie moderne bakrecepten
I absolutely adore making Mini Valentine Tartlets! These delightful treats are perfect for expressing love on any special occasion, especially Valentine's Day. With their buttery crust, luscious filling, and fresh fruit topping, they create an irresistible combination of flavors and textures. Each bite is a sweet surprise, and I love how they can be personalized for anyone you cherish. They come together quickly and can easily impress your loved ones, making them a go-to recipe in my kitchen.
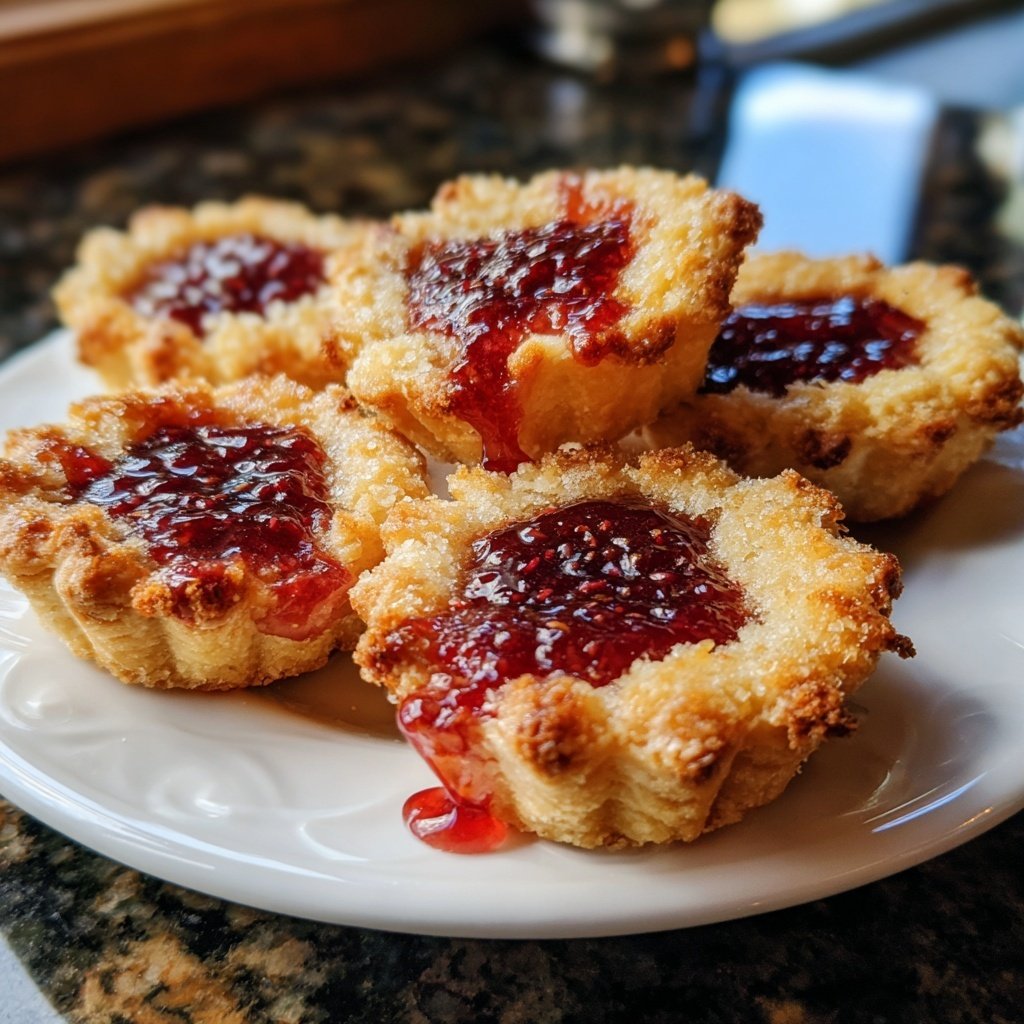
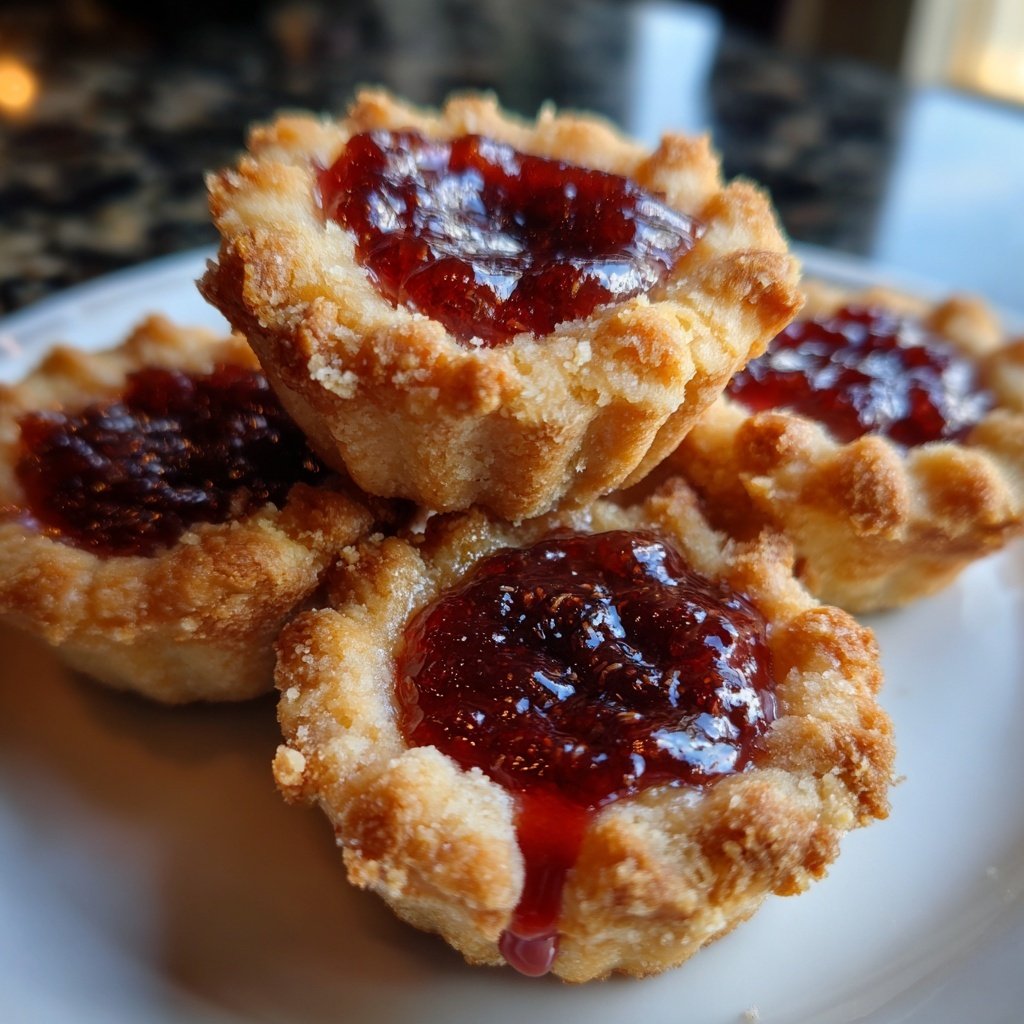
When I first made these Mini Valentine Tartlets, I was amazed by how quickly they came together. The buttery crust bakes up beautifully, cradling a velvety filling that melts in your mouth. I experimented with different toppings like strawberries and whipped cream, but I found that a bit of fresh raspberries adds the perfect tangy contrast. It’s all about balancing the sweetness to ensure each tartlet is a delightful experience.
These tartlets have become a staple during Valentine’s month. Each time I make them, I enjoy seeing the smiles on my family’s faces when they take that first bite. I always recommend allowing the tarts to chill for a bit before serving. This not only helps the filling set up nicely, but also enhances the overall flavor!
Why You'll Love These Tartlets
- Buttery, flaky crust that melts in your mouth
- Versatile fillings that can suit anyone's taste
- Visually stunning, making them perfect for any celebration
Crafting the Perfect Crust
The crust is the foundation of your Mini Valentine Tartlets, so choosing the right butter is crucial. Opt for high-quality unsalted butter, as it allows you to control the saltiness of your crust. When mixing the ingredients, ensure that the butter is softened but not melted; otherwise, your crust may become too greasy instead of flaky. Pressing the dough firmly into the tartlet pans helps create an even base, which is essential for holding the filling without breaking.
After baking, the crust should turn a beautiful golden color, which typically takes about 12-15 minutes in a preheated oven at 350°F (175°C). Keep an eye on them to prevent over-baking, as a dark crust may affect the overall flavor of the tartlets. If any cracks appear, don’t worry; they can often be filled in with the cream cheese filling, ensuring a seamless appearance.
Filling Options and Customization
The filling for these tartlets can be altered based on personal preferences or dietary restrictions. For a lighter option, substitute half of the cream cheese with Greek yogurt, which will provide a tangy flavor while keeping the texture creamy. Additionally, using a flavored whipped cream, such as vanilla bean or citrus zest, can add an extra layer of deliciousness to the filling. Be cautious not to overmix the whipped cream when folding it in; a gently folded mixture maintains that airy texture essential for a light filling.
When it comes to toppings, fresh fruits are not just a garnish; they play a role in flavor balance. Strawberries and raspberries offer a sweet and slightly tart contrast to the creamy filling. For a twist, consider using tropical fruits like mango or kiwi, which add vibrant color and unique taste. Just be sure to slice fruits thinly to ensure they adhere nicely to the filling and don’t overwhelm the delicate tartlets.
Storage and Serving Suggestions
These Mini Valentine Tartlets can be made ahead of time, which is great for busy occasions. Store the baked and cooled crusts in an airtight container at room temperature for up to three days. The filling can be prepared a day in advance; just ensure you chill it until ready to use. Assemble the tartlets only a couple of hours before serving to keep the crust crisp and the toppings fresh. If not serving immediately, store them assembled in the refrigerator for best results.
To elevate the presentation, consider dusting the tartlets with powdered sugar just before serving, adding a touch of elegance. For a bit of extra indulgence, a drizzle of chocolate ganache over the fruit can create a stunning contrast and rich flavor. Arrange the tartlets on a decorative platter for special occasions, making them not just a treat for the taste buds but also a feast for the eyes.
Ingredients for Mini Valentine Tartlets
For the Crust
- 1 cup all-purpose flour
- 1/2 cup unsalted butter, softened
- 1/4 cup powdered sugar
- 1 egg yolk
- 1/4 teaspoon salt
For the Filling
- 1 cup cream cheese, softened
- 1/2 cup granulated sugar
- 1 teaspoon vanilla extract
- 1 cup heavy cream, whipped
- Fresh fruits for topping (strawberries, raspberries, etc.)
Enjoy your tarts!
Instructions
Prepare the Crust
In a bowl, mix the flour, powdered sugar, and salt. Then, add the softened butter and egg yolk, blending until a dough forms. Press the dough into mini tartlet pans and refrigerate for 15 minutes. Preheat your oven to 350°F (175°C). Bake the crusts for 12-15 minutes until golden. Let them cool completely.
Make the Filling
In another bowl, beat the cream cheese and granulated sugar until smooth. Add the vanilla extract and fold in the whipped cream gently. Spoon the mixture into the cooled tart shells, smoothing the tops.
Top and Chill
Decorate your tartlets with fresh fruits of your choice. Chill the tartlets in the refrigerator for at least 30 minutes before serving for the best texture.
Serving Suggestions
Professionele Tips
- For an elegant touch, drizzle some chocolate sauce or a dusting of cocoa powder over the tartlets before serving. You can also use a mix of berries for an eye-catching variety!
Techniques for Success
To ensure your tartlet crusts turn out perfectly, avoid overworking the dough. Mixing until just combined helps prevent gluten development, leading to a more tender texture. If the dough feels too soft to handle, chilling it for another 10-15 minutes can help firm it up and make it easier to press into the tartlet pans. You can also use a fork to dock the crust before baking; this helps to prevent any air bubbles while cooking, resulting in a more uniform tart shell.
When making the filling, achieving the right consistency is key. After beating the cream cheese and sugar, ensure it is completely smooth before folding in the whipped cream. If you find lumps in the cream cheese, consider using an electric mixer on low to break them down first. This will help you avoid a grainy filling, providing a luxurious mouthfeel that complements the lightness of the whipped cream.
Flavor Variations
Experimenting with flavors can bring new life to your Mini Valentine Tartlets. Consider adding a splash of almond extract to the filling for a warm, nutty flavor. Alternatively, incorporating citrus zest, such as lemon or orange, can brighten the filling and enhance its overall taste. You can also make a chocolate version by mixing cocoa powder into the cream cheese filling or using a chocolate tart crust.
For those who prefer a more decadent treat, you might consider layering a fruit compote beneath the cream cheese filling. Cooking down mixed berries with a bit of sugar until syrupy creates a luscious base that adds complexity and moisture to the tartlet. Just remember to let it cool before scooping the filling on top, so it doesn't melt.
Vragen Over Recepten
→ Can I use a different fruit?
Absolutely! Any fresh fruit like blueberries or kiwi works well.
→ How long do these tartlets last?
They can be stored in the refrigerator for up to three days but are best enjoyed fresh.
→ Can I make the crust ahead of time?
Yes, you can prepare the crust a day in advance and store it in the refrigerator.
→ Is this recipe suitable for gluten-free diets?
You can substitute the all-purpose flour with a gluten-free blend for a gluten-free version.
Mini Valentine Tartlets
Gemaakt door: Ophelia Turner
Recepttype: Collectie moderne bakrecepten
Vaardigheidsniveau: Intermediate
Eindportie: 12 tarts
Wat je Nodig Hebt
For the Crust
- 1 cup all-purpose flour
- 1/2 cup unsalted butter, softened
- 1/4 cup powdered sugar
- 1 egg yolk
- 1/4 teaspoon salt
For the Filling
- 1 cup cream cheese, softened
- 1/2 cup granulated sugar
- 1 teaspoon vanilla extract
- 1 cup heavy cream, whipped
- Fresh fruits for topping (strawberries, raspberries, etc.)
Stappen
In a bowl, mix the flour, powdered sugar, and salt. Then, add the softened butter and egg yolk, blending until a dough forms. Press the dough into mini tartlet pans and refrigerate for 15 minutes. Preheat your oven to 350°F (175°C). Bake the crusts for 12-15 minutes until golden. Let them cool completely.
In another bowl, beat the cream cheese and granulated sugar until smooth. Add the vanilla extract and fold in the whipped cream gently. Spoon the mixture into the cooled tart shells, smoothing the tops.
Decorate your tartlets with fresh fruits of your choice. Chill the tartlets in the refrigerator for at least 30 minutes before serving for the best texture.
Extra Tips
- For an elegant touch, drizzle some chocolate sauce or a dusting of cocoa powder over the tartlets before serving. You can also use a mix of berries for an eye-catching variety!
Voedingswaarde (Per Portie)
- Calories: 150 kcal
- Total Fat: 10g
- Saturated Fat: 5g
- Cholesterol: 20mg
- Sodium: 75mg
- Total Carbohydrates: 14g
- Dietary Fiber: 1g
- Sugars: 5g
- Protein: 3g